Guides
Seeds of Calamity Museum Guide: Fish, Bugs, Artifacts, and Donations
Quick Answer
Treat the Seeds of Calamity museum as a first-copy decision board: search the fish, bug, dungeon drop, crystal, or rare item you just found, then keep or donate the first copy before selling extras.
Collection Workspace
Museum First-Copy Ledger
Use this as the can-I-sell-it check before turning first copies into money.
Start Here
What Are You Trying To Finish Today?
Pick the session goal first. The tool gives you the guide, next steps, what to bring, and what not to sell.
Sell Safety
First Copy Before Sell Value
Search the item you just found. If it appears here, keep or donate the first copy before selling extras.
Town fishing spots, Spring, One shadow
Store or donate first catchCliffside pond north of the farm, Unknown, One shadow reported
Store first catch until museum state is checkedLeft and upper map fishing spots, Spring, Sparkling fishing spot
Store first catch and compare with Angler/Curator progressLeft and upper map fishing spots, Summer, Sparkling fishing spot
Store first catch and compare with Angler/Curator progressLeft and upper map fishing spots, Autumn, Sparkling fishing spot
Store first catch and compare with Angler/Curator progressLeft and upper map fishing spots, Winter, Sparkling fishing spot
Store first catch and compare with Angler/Curator progressOutside-village special areas: left island, upper-left map, and nearby cave checks, Any season reported, Sparkling fishing spot
Store first catch and compare with Angler/Curator progressAbandoned Mines, Dungeon route, Single big-fish spot
Store first catch and compare with dungeon collection gapsSlime Caverns, Dungeon route, Single big-fish spot
Store first catch and compare with dungeon collection gapsMolten Boneyard, Dungeon route, Single big-fish spot
Store first catch and compare with dungeon collection gapsAncient Stump; bait: Sugar Melon
Catch and mark donated before spending duplicate baitAncient Stump; bait: Fiber
Catch and mark donated before spending duplicate baitAncient Stump; bait: Princess Radish
Catch and mark donated before spending duplicate baitAncient Stump; bait: Belle Mushroom
Catch and mark donated before spending duplicate baitFallen Log; bait: Acorn
Catch and mark donated before spending duplicate baitFallen Log; bait: Sun Drop Petals
Catch and mark donated before spending duplicate baitFallen Log; bait: Bluebell
Catch and mark donated before spending duplicate baitFallen Log; bait: Mushtree Sap
Catch and mark donated before spending duplicate baitLarge Rock; bait: Rock Hen Egg
Catch and mark donated before spending duplicate baitLarge Rock; bait: Ruby Squash
Catch and mark donated before spending duplicate baitLarge Rock; bait: Snowtop Wool
Catch and mark donated before spending duplicate baitLarge Rock; bait: Goldenrod
Catch and mark donated before spending duplicate baitOld Ruins; bait: Attuned Crystal
Catch and mark donated before spending duplicate baitOld Ruins; bait: Sweet Syrup
Catch and mark donated before spending duplicate baitAbandoned Mine; bait: Emerald
Catch and mark donated before spending duplicate baitAbandoned Mine; bait: Crystallized Slime
Catch and mark donated before spending duplicate baitSlime Caverns; bait: Scarlet Scales
Catch and mark donated before spending duplicate baitSlime Caverns; bait: Sun Opal
Catch and mark donated before spending duplicate baitMolten Boneyard; bait: Terrorbird Feathers
Catch and mark donated before spending duplicate baitMolten Boneyard; bait: Garnet
Catch and mark donated before spending duplicate baitLikely combat or rare-material progression; exact source still not publicly locked
Store first copy, then check recipes, museum, shrine-style asks, and achievementsAttuned crystal nodes, dungeon mining rooms, and random battle drops are player route leads
Needed as Blaze Beetle bait and worth storing before crafting or sellingAchievement list confirms all Platinum Crystals are tied to Energetic
Track every pickup for Energetic and 100% cleanupSlime battle drops
Needed as Golden Ruff baitScarlet Bane battle drops
Needed as Blood Beetle baitTerrorbird battle drops
Needed as Painted Long Horn baitSun Opal nodes or chests
Needed as Paradise Moth baitGarnet nodes or chests
Needed as Ignis Worm baitEmerald nodes, battle drops, or chests
Needed as Ruby Fly baitmonster drop; public sell price 24 gold
Low-value monster drop; hold first copy until quest, museum, and bait checks are clear.monster drop; public sell price 24 gold
Sort with slime-family drops after dungeon runs.monster drop; public sell price 28 gold
Store first copy, sell duplicates when no guide route asks for it.monster drop; public sell price 28 gold
Hold first copy with poison-family drops.monster drop; public sell price 33 gold
Store first copy from crawler routes.monster drop; public sell price 33 gold
Hold one, then sell duplicates if bag pressure is high.gem; public sell price 33 gold
Bring to Abandoned Mine for Ruby Fly before selling extras.gem; public sell price 33 gold
Store first copy with gems and crystal routes.gem; public sell price 33 gold
Store first copy with gem checks.monster drop; public sell price 38 gold
Bring to Slime Caverns for Blood Beetle.monster drop; public sell price 38 gold
Hold first copy from combat routes.monster drop; public sell price 38 gold
Bring to Molten Boneyard for Painted Long Horn.gem; public sell price 38 gold
Store first gem copy before selling extras.gem; public sell price 38 gold
Store first gem copy before selling extras.gem; public sell price 38 gold
Bring to Slime Caverns for Paradise Moth.monster drop; public sell price 43 gold
Hold first copy with monster drops.monster drop; public sell price 43 gold
Hold first copy with poison-family drops.gem; public sell price 43 gold
Store first gem copy before selling extras.gem; public sell price 43 gold
Store first gem copy before selling extras.gem; public sell price 43 gold
Bring to Molten Boneyard for Ignis Worm.crystal; public sell price 48 gold
Hold with crystal and monster-drop overlap items.monster drop; public sell price 57 gold
Store first copy and check Dire Fang guide before crafting or selling.monster drop; public sell price 62 gold
Hold first copy from crawler routes.monster drop; public sell price 67 gold
Store first copy from Bane-style enemies.monster drop; public sell price 76 gold
Hold first copy with combat drops.monster drop; public sell price 81 gold
Store first copy from Terrorbird routes.monster drop; public sell price 86 gold
Hold first copy, sell duplicates after route checks.artifact; public sell price 110 gold
Treat as artifact-style; check museum before selling.artifact; public sell price 110 gold
Treat as artifact-style; check museum before selling.artifact; public sell price 129 gold
Check museum/storage before selling.artifact; public sell price 130 gold
Treat as artifact-style; check museum before selling.artifact; public sell price 130 gold
Treat as artifact-style; check museum before selling.monster drop; public sell price 144 gold
Hold first copy from late monster routes.artifact; public sell price 150 gold
Treat as artifact-style; check museum before selling.artifact; public sell price 150 gold
Treat as artifact-style; check museum before selling.artifact; public sell price 160 gold
Store first copy; only sell duplicates after museum checks.artifact; public sell price 350 gold
High value, but check museum before selling first copy.artifact; public sell price 380 gold
High value, but check museum before selling first copy.artifact; public sell price 410 gold
Highest public price; still store first copy until museum checks are clear.Any rare fish, bug bait, dungeon drop, crystal, quest item, or artifact-style find
Hold one until museum, quest, shrine, and achievement checks are clearNo museum rows match this filter.
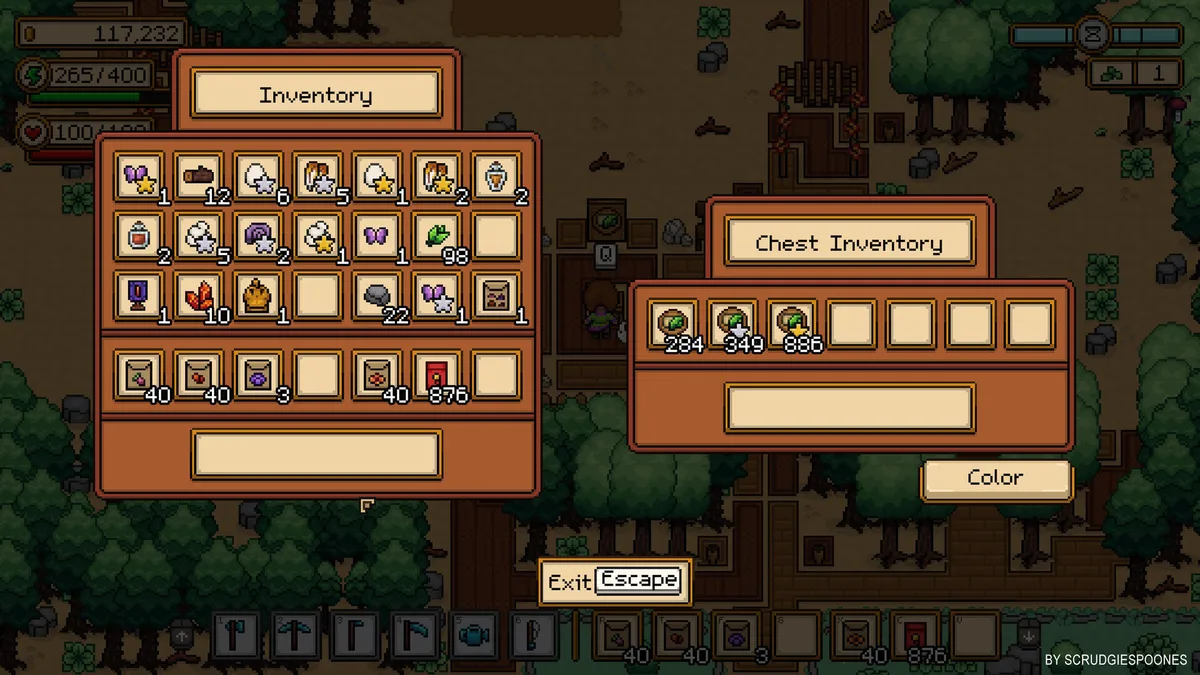
The museum is where many separate Seeds of Calamity systems finally collide. Fish, bug riddles, artifacts, dungeon finds, and shrine-style collection pressure all funnel into one question: can you safely sell this item yet? Use the first-copy ledger above to search the item, mark whether it is missing, stored, donated, or safe as an extra, then keep this page open during long saves alongside the full Seeds of Calamity Guide Hub.
Last checked: June 2, 2026. This guide focuses on collection routing, not broad lore or story recap.
Quick Answer
Treat the museum as a collection dashboard, not a final errand. Donate routine catches early, store one copy of unclear rare items, mark the saved checks above, and divide missing entries into fish, bugs, dungeon/artifact finds, and special progression items before you start random grinding.
| Missing lane | Best supporting guide | What to do first |
|---|---|---|
| Fish | Fishing Guide | Track spot, season, weather, and shadow clue |
| Bugs | Bug Guide | Match location with exact bait answers |
| Dungeon finds | Dungeon Guide | Repeat chest, enemy, and mining-room routes |
| Rare materials | Dire Fang and Enhanced Crystals | Hold first copies until their use is clear |
Museum Route Board
Use the route picker above, then match the missing lane here:
| Missing lane | Best route | What to save |
|---|---|---|
| Fish | One season and one spot family at a time | First rare catch and anything with a strange shadow clue |
| Bugs | Surface bugs first, dungeon bugs during combat runs | Exact bait item and solved bug status |
| Dungeon finds | Chest, mining room, and enemy-drop loops | First copy of artifacts, crystals, monster drops, and odd loot |
| Rare materials | Dire Fang, Enhanced Crystals, altar-style routes | One copy before crafting, selling, or offering |
| Achievement cleanup | Achievements page as the master list | Any item that overlaps Curator or 100% |
The museum gets easier when you stop calling everything “missing item” and turn it into a lane: fish, bugs, dungeon, rare material, or achievement cleanup.
Museum Triage Table
| Symptom | Likely lane | Best next page |
|---|---|---|
| You are missing several seasonal catches | Fish | Fishing Guide |
| A bug entry is blocked by a clue | Bug riddles | Bug Guide |
| The museum is almost done but combat drops are unclear | Dungeon/artifacts | Dungeon Guide |
| Curator is blocking 100% | Full completion route | Achievements Guide |
Donate, Store, or Sell
| Item type | Donate | Store | Sell |
|---|---|---|---|
| Common fish already donated | No | Only if a recipe or request needs it | Yes, as overflow |
| Rare fish or first seasonal catch | Usually yes | If a quest or recipe is active | Not until the lane is clear |
| Bug from a solved riddle | Yes if museum needs it | If you are checking achievements first | Avoid selling first copy |
| Dungeon drop with unclear use | Only if museum accepts it | Yes, first copy | Only duplicates |
| Crystal or shrine-looking item | Check rare-material route first | Yes | Only after its use is confirmed |
This table is the museum habit that matters most: first copy stays out of the sell bin until a lane tells you it is safe.
Overview
This museum guide is about routing, not romance. The goal is to help you turn a messy collection problem into a simple set of lanes: fish, bugs, artifacts, and special finds.
What Can Be Donated to the Museum?
The museum should be treated as a collection dashboard. If an item feels like a named catch, a bug entry, an artifact-style find, or a rare dungeon collectible, assume it might matter before you sell it.
| Donation lane | Typical source |
|---|---|
| Fish | Town, farm-adjacent, cliffside, and special fishing spots |
| Bugs | Surface and dungeon bug locations with bait puzzles |
| Artifacts and dungeon finds | Mining, chests, enemy drops, and combat progression |
| Special collection items | System-dependent and often tied to progression cleanup |
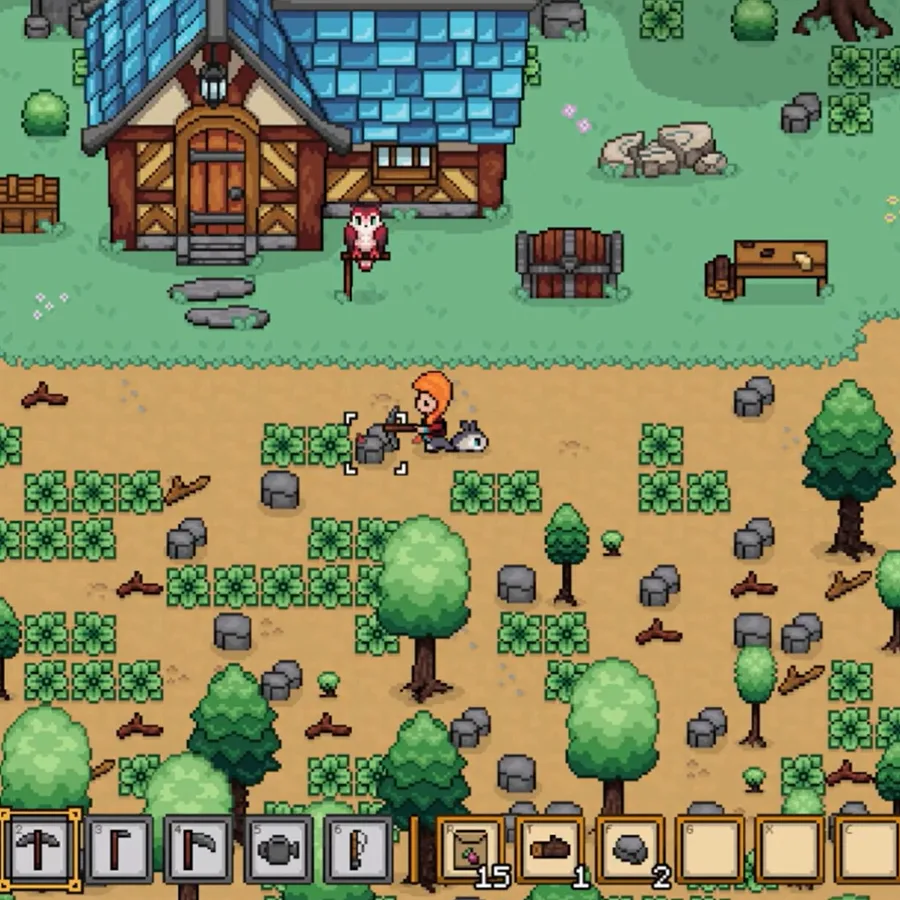
Fish Collection
Fish are one of the easiest museum categories to delay and one of the most annoying to finish late. Seasonal windows and rare fish clues mean you should donate or store notable catches as soon as possible. The fishing guide is the fastest supporting page here because it gives you a cleaner way to track spot families and rare-fish logic.
Bug Collection
Bugs are the category most likely to confuse players because the museum requirement depends on both finding the right location and solving the right bait riddle. That makes bug collection slower than a simple “visit this map tile” system, but it also makes it more manageable once you track it by location family.
If you still have many empty bug entries, use the bug guide before you keep wandering. The right bait answer saves much more time than more map travel.
Artifacts and Dungeon Finds
This is where museum progress starts to feel tied to combat. Artifacts and similar rare finds often depend on dungeon repeats, chests, or mining rooms. That means museum progress can stall even if your farm looks healthy. When that happens, the answer is usually not better crop income. It is more disciplined dungeon routing.
| Problem | Best response |
|---|---|
| Missing rare finds | Revisit dungeon and chest-heavy routes |
| Unsure whether an item is safe to sell | Hold one copy until you check museum needs |
| Museum almost finished but one lane is stalled | Isolate the missing lane: fish, bugs, or combat finds |
| You keep forgetting what you already donated | Maintain a manual checklist by category |
Shrine Offerings
Shrine offerings are not always identical to museum donations, but players often search them together because both systems punish careless selling and weak inventory tracking. If an altar or shrine asks for something unfamiliar, slow down and check whether it sits in the same rare-item family as museum or dungeon progression.
The enhanced crystals guide is especially useful here if your save is tangled around crystal or altar progress.
Museum Completion Checklist
Use a category-first checklist instead of trying to remember item names alone:
- Check fish by season and spot family.
- Check bugs by location and solved bait.
- Check artifacts and dungeon finds by combat progress.
- Check special or shrine-adjacent items you may have sold too early.
- Revisit the achievements guide if Curator is part of a 100% route.
Quick Checklist
- Donate routine catches early.
- Keep one copy of unclear rare finds.
- Treat bugs and fish as seasonal work, not final cleanup only.
- Re-enter dungeons when museum progress stalls around artifacts.
Confirmed vs Needs Verification
| Museum detail | Status | Practical response |
|---|---|---|
| Fish and bugs support museum progress | Confirmed by collection overlap | Use fishing and bug pages as active companions |
| Curator-style completion links to achievements | Confirmed by public achievement references | Treat museum progress as part of 100% routing |
| Exact final list of every donation item | Needs current in-game confirmation | Track missing lanes manually |
| Whether unclear rare materials are donation items | Needs item-by-item verification | Store first copies before selling |
| Dungeon/artifact lane details | Partly dependent on save progression | Revisit dungeon routes when museum stalls |
FAQ
What usually blocks museum completion?
The last missing entries are often seasonal fish, solved-but-uncaught bug entries, or rare dungeon finds that were never tracked carefully.
Is the museum tied to achievements?
Yes. Curator is part of the broader achievement cleanup, which is why museum progress should not be left entirely for the end.
Should I prioritize the museum early?
You do not need to force it on day one, but you should build habits that feed it early, especially for fishing and bug catching.
What if I cannot tell whether an item belongs in the museum?
Keep the first copy. In this game, unclear collectibles are much safer in storage than in the sell bin.
Related Guides
Need the wider map? Return to the Seeds of Calamity Guide Hub. These guides are the most useful companions for museum cleanup:
| Guide | Why it helps |
|---|---|
| /guides/seeds-of-calamity-fishing-guide/ | Best page for fish tracking and rare catch logic |
| /guides/seeds-of-calamity-bug-guide/ | Best page for bait and riddle-based bug cleanup |
| /guides/seeds-of-calamity-achievements/ | Useful when Curator is part of a 100% route |
| /guides/seeds-of-calamity-dungeon-guide/ | Helps if artifacts and rare combat finds are your bottleneck |
| /guides/seeds-of-calamity-enhanced-crystals/ | Useful if shrine and crystal systems are overlapping with your collection problem |
FAQ
What counts for museum completion in Seeds of Calamity?
Players mainly search museum completion through fish, bugs, artifacts, and other collectible donations, with shrine-related progress often overlapping with wider completion goals.
Why does museum progress take so long?
Because it touches seasonal fish, bug riddles, dungeon finds, and rare drops. The museum is a summary of many systems, not a single track.
Should I donate everything immediately?
Donate routine collectibles quickly, but pause before selling or consuming rare or unclear items until you know whether they matter for the museum, a shrine, or a late recipe.
Which guides should I combine with this one?
Fishing, bug, achievements, and dungeon are the most useful supporting guides for museum completion.